This blog will show you three amazing tips on how you can create professional looking GoPro videos. These cameras have become increasingly popular the past few years with people mainly using them to film sports. Recently I took the GoPro Hero camera to film my journey down the mountain on the world cup trails at Mont Sainte Anne in Québec Beaupré (footage above.) Here are some filming tips from what I’ve learned:
GoPro Hero 4 Cameras captures amazing sports footage at up to 60fps
#1 Checking 1, 2, 3: Make sure that the lens on your camera is clear of finger prints and debris. Fully charge your batteries, and make sure your SD cards are empty, so you won’t run out of space. If you have more than one GoPro, place them in areas where you think it will take the best shots for example, if I’m on my bike, I will put it on my helmet, chest, etc. When choosing angle settings, I like the “wide angle” lens mode. That way the audience can see what you’re doing. I’ve tried the “medium angle” setting before, you don’t seem to get as much of the coverage and it’s more difficult to interpret what you are doing.
Tighten any loose straps and secure them so they are not moving around during activity. Before you actually record, make sure you check your shots so that they are set up properly by recording from each camera for about 10 seconds then checking it’s shot.

#2 Editing Philosophy: Before editing begins, think about how your video will be assembled. Review all of the footage you have recorded and get ideas on how you will edit yours by watching clips that inspires you, notice the use of music, and font choices. Having an objective to how you edit your project is one of the most important aspects in creating a unique video.
A technical way of choosing my clips is to import all of the footage I’ve captured onto the video editing software’s timeline. I then mark down the most interesting clips on the timeline digitally. I organized it into categories such as “fast moments,””miscellaneous shots,” etc.
Once you have identified your shots, start assembling your video; working towards the objective that you had thought of earlier. Read my previous blog to learn more about the thinking process that goes into video editing.
If you watch television nowadays, their shots are quite short and right to the point. Each cut is around 2-3 seconds! However, if your shots are of people skydiving, rafting, etc, you may want to hold them longer. If you have a second GoPro camera, you can cut between the two shots to hold the audience’s attention longer (unfortunately, audience’s attention levels have been decreasing over the years, so if you want people to be entertained, that would be one of the ways to do it.) GoPro audiences enjoy fast-paced, exciting videos. You can review some of the edits on their YouTube page. In our video, the shots were held longer than normal to show the technical aspects in riding a bike in that kind of terrain.
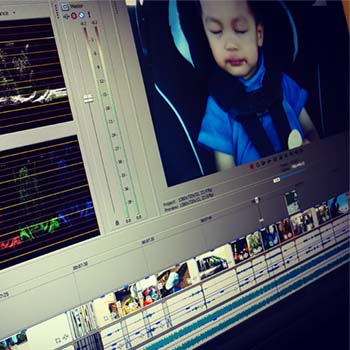
Once you have roughed in the footage, you can open your video scopes in your editing software to check the brightness, contrast and saturation of your picture, then adjust accordingly. Watch this video on how to use video scopes.
GoPro cameras can be mounted even on handle bars. Scott Gambler 730 2015.
#3 No Listening… You Hear Me? Sound and music are important aspects in any video. At this moment, it’s time to import the music for your project. You should have already thought about music before editing began. Normally in my projects, I start off by listening to music which then inspires the actual video.
Some of the popular sites for music are www.bensound.com, www.incompetech.com, Jamendo, and the YouTube library source. Read my previous blog for a more in depth look at how music can be edited to sound like it was custom composed for your video.
In our example, the song had four cuts in the video. Originally, the music was over 3 minutes, but it was cut down by half. The cuts were made on the “beat” of the music. I also made the music transitions more difficult to hear by mixing them with sound effects from the bike.
Next, I added in sound effects to intensify the experience as GoPro cameras don’t capture great audio. I’ve heard that placing an audio recorder like the ZOOM H4N (records at 24bits) in your back pocket can pick up good bike sounds. In this video, I ended up using audio from other rides and syncing it up to the clips.
The thinking behind our sample video above was to show the speed of decent and technical riding. When edited, it has proven to be quite repetitive and boring, so I cut random clips from the day throughout the video to make it more interesting. However, there were not enough clips to last the length of the music – without adding more cuts to the music anyway. I ended up using some royalty free footage from a website called Pexels to solve the issue.
So there you have it, the 3 most important tips when you work on your GoPro videos. If you have any questions about video production, please feel free to contact us. And like always, happy editing!
