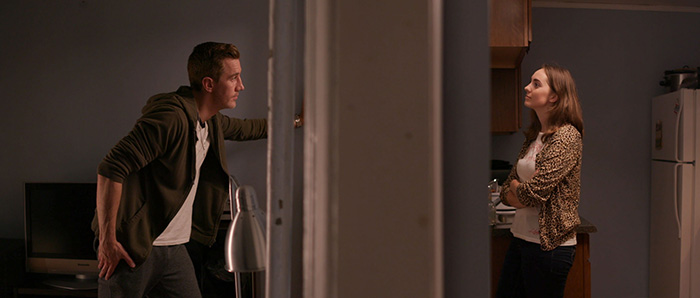
Aleksandra Maslennikova & Matthew Sauvé stars in our webseries Forgotten Corpses.
Recently I have been producing a horror webseries! The short stars Aleksandra Maslennikova and Matthew Sauvé. It’s my first real horror film so I did some research on how to create tension and structure your film. If you’re an indie filmmaker, this blog will offer you some of my own notes and insights into creating a scary sequence.
First, I would like to to thank my entire cast and crew for taking part in the project, as I met some new people and got to work with some old-timers. Be sure to check out Forgotten Corpses on Facebook. Without any further ado, here are my 5 tips:
#1 Scaredy Cats
Creating the characters and casting the correct people for the film is crucial. Most of the films I’ve researched consist of at least one unstable, overly emotional character. Consider as an example the indie film The Blair Witch Project. This film was created in 1999 on a $60,000 USD budget and grossed about $250 million. This film featured an unstable character who was scared of just about everything. We see this example at the end of the film in a famous shot with the flashlight shining onto her face where she told the audience she was scared of the dark. This character trend can also be seen in the horror flick, Paranormal Activity which followed two characters: one of which was an unstable girl, haunted by a demon who told her partner not to arouse the spirits in the house.
Having these types of characters makes the audience more intrigued while watching the film because it creates a sense of entertainment. And by watching how scared they are, the audiences can feel the connection to the emotion of the character through the screen.
#2 Scare Tactics:
There are several scare tactics in which you can use to improve the quality of your horror flick.
Jump Scares – These are ones that jump at you, surprising you with a sudden action and/or loud sound effect. The shot normally starts with a long quiet frame of the unsuspecting character, then followed by something appearing onto the screen quickly and aggressively. Jump scares are difficult to accomplish as real suspense is hard to arouse in a horror film savvy audience. Therefore it has to be planned well and executed with precision, a good example of this is the title in The Cabin in the Woods as it cuts onto the screen with an unexpected sound effect.
Suspense Scare – This is fear of the unknown such as when a character follows a suspected murderer into the cellar of his or her basement. The audiences are waiting to see the outcome, they do not know what will happen to the fate of the character and that is what makes suspense scares scary.
Distortion of the Human Figure – The Exorcist is a good example of this tactic where we see an innocent girl moving her body in a abnormal way as her character is being controlled by a demon in the film.
Human Psych – These films toys with your mind, topics like the mentally disturbed or self destruction, suicide and pedophile characters are the norm for this tactic. A good example is the murdererous character Anton Chigurh from No Country for Old Men.
Scare Lingers – This consists of a montage of death sequences that are uncomfortable and violent to watch. They are usually mixed with music and horrific sounds.
Emptiness of Death – These tactics normally involve of scenes that are abstract, quite and has long shots sometimes running into several minutes in length. A good example of this is when the blood fills the room in slow motion from the motion picture The Shining. It creates the effect of suffocation and makes you feel like you’re drowning in blood.
For a more in depth review about these tactics, be sure to watch this video.
#3 Boo! Doesn’t always work unless…
If you watch and analyse successful horror flicks they have jumpy sounds to scare you and low rumbling noises to setup the suspense in the shot. Check out some of these Lord of the Rings sound effects that they used for their creatures, also here are some examples of scary ambience noises to give you a better idea.
There are a few great websites to download sound effects from such as Audio Jungle and many other sounds that you can grab from Youtube. However before doing so, be sure to ask the publisher’s permissions first.
Creating the best sound for your short boils down to knowing how to layer your sound clips effectively. There is a ton of excellent software’s today that you can use to edit sound. I use Sony Vegas, but Adobe Premiere is popular and Pro Tools by Avid is the industry standard for sound design. Also Andrew Kramer from Video Co-Pilot has a great sound library that you can use as it is filled with trailer swishes and impacts.
While building your sounds, you can also manipulate a particular element like increase it’s pitch, or slow it down to add a subtle change. This can add a unique dimension to your picture. It can takes years of practice to dial it in, read my other blogs on sound.
Sound is really an important aspect in filmmaking and can add production value if used properly. You can add helicopters, dragons to distant war ambience effects, which can create an epic feel to your indie film.
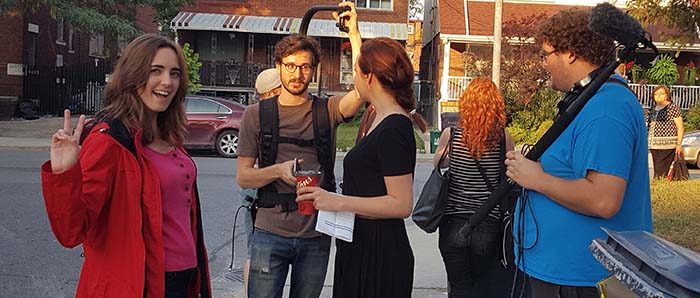
Early morning means no one on the street, perfect for those quiet moments in the series!
#4 Editing Matters: Creating a short film with a perfect cut neither comes easy, nor happens over night. It takes some thinking to do. If you can edit your film while considering the audience’s perspective, then your scare’s can become more successful. I know from personal experience as I have tested my rough cut with my two year old son to great effect. Editing in your audience’s perspective is to try to get a feel for how your viewer will watch the film for the first time. How can you build up the tension in your movie to the maximum effect? During the editing process, you will become numb to your own scares, it’s good to take a few days off and revisit the cut on a later date. Otherwise, you can set up a test audience and obtain feedback from them. Check out this video on how to create tension.
For my poor two year old, I used low rumbling noises and long eerie cuts to set the mood. When I introduced our zombie, I had a screechy sound effect along with a zombie hiss which startled him. He jumped back and started tearing up… I am just hoping I don’t get in trouble with child services!
Ultimately, the way you edit the horror films can either have the right impact or a negative one for your audiences. In our 8 minute pilot, the entire piece builds suspense at the beginning. The audience waits for that jump scare that will never come… or will it? It is only until after our action sequence and our moments with the characters that they forget that they’re watching a horror. This is the time to strike, and hit them with one of the scare tactics. I hope that that you will enjoy it once the series is completed.
#5 Colour Grade it!
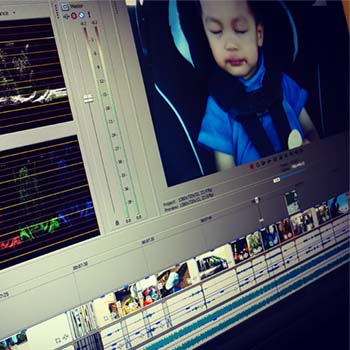
Finally but not least, you must paint your picture to create the feel you want to bring across to your audience. Be sure to use video scopes if you don’t have a calibrated monitor.
Here’s a quick run down of each item in video scopes: the waveform monitor determines if your video is over or under exposed by making sure the data is between the 0 and 100 values. The vector scope helps you look at the saturation level of the picture, normally keep it at around 50% – 60%. The RGB parade determines which colours are dominant in the frame so that you can colour balance the video if it’s not accurate. And finally the histogram helps you see where most of the brightness and darkness levels are sitting on the frame so that you can make the appropriate adjustments. Check out this video to learn more about using video scopes.
Once you have your film colour corrected, you can start colour grading. Colour grading is where you can make the artistic touches and create the feel of your film. Most Hollywood films today set their tones towards the red and blue channels of the colour spectrum in the vector scope as you can see in most of the film examples. There’s no wrong or right way of doing this part, it all comes down to what message the filmmaker would like to send to the audience. In general, blue colours gives the audiences a cold feeling, while yellow and orange colours creates a warm and safe environment.
In our pilot, we will be de-saturating the colours slightly and pushing the tones towards the blue spectrum to project an uncomfortable feeling onto the audience.
Forgotten Corpses comes out in the next few months so stay tuned! If you have any questions regarding video production or video editing, please feel free to contact us and like always, happy editing!
